How to Create a Product Onboarding Campaign in HubSpot
Onboarding is a crucial part of any product experience. When done right, it can help your users become familiar with your product quickly, and get the most out of it. In this guide, we'll look at how to create product onboarding campaigns in HubSpot.
HubSpot marketing automation tool helps businesses to create basic product onboarding campaigns. It offers a range of features that allow businesses to design and send emails, track performance, and optimize campaigns. If you are just starting out with your very first product onboarding campaign, HubSpot is a good beginner’s tool.
This simple guide helps you build your first product onboarding emails and campaigns in HubSpot.
Bring product activity data into HubSpot
Before you set up your onboarding emails and campaigns, you need to bring in your product activity data into HubSpot platform. This process is the most complex step in building any of the product activity based campaigns in HubSpot as HubSpot doesn’t have native integration with data warehouses for bringing in product data to HubSpot.
To do this, you’ll have to depend on some data piping tools like Hightouch, Syncari or Census. These tools allow you to query your app database or any other data store and map the data to HubSpot properties.
Create the automated emails
Before setting up the campaigns in HubSpot, you will need emails for the campaigns. The first email you want to create for a product onboarding campaign is a welcome email, followed by a series of other helpful emails. These emails should introduce the customer to your product and features and explain why they are important.
Here’s how to create automated emails in the HubSpot marketing platform:
Step 1: Create from Scratch or Customize a Template
The first step to creating an email in HubSpot is to either choose a template or create an email from scratch. HubSpot provides a wide variety of templates to choose from, so it is important to select one that is optimized for the intended audience and purpose of the email. You can choose any of the pre-built templates and customize it according to your need or just create an email from scratch.
Once the template is selected, it is time to customize the design to fit your brand. HubSpot makes this easy by providing options to upload company logos, change font sizes and colors, and adjust other design elements. HubSpot’s email builder comes with a drag-and-drop block builder which lets you create stunning templates in no time. Make sure you use your brand colors, typography, and logos in your email.
💡 Remember: Select 'automated email' when starting out the build.
Step 2: Create and add Content
The next step is to add content to the email. This includes the body of the email, as well as images, videos, or other media that is to be included. It is important to ensure that the content is engaging and relevant to the intended audience.
Since you are sending the onboarding emails to the customers who just signed up for your product, it’s important to create content that actually helps your newly signed up customers to get the most out of your product.
You can use the drag-and-drop blocks to add blocks required for your content area or you can directly edit the content on your template block. Here’re some of the email copies you can use for the product onboarding campaign:
Email 1: Welcome email
Subject line: Welcome to WHTboard {firstname}!
Hi {firstname},
Welcome to WHTboard! We're happy you've joined the WHTboard family and look forward to partnering with you.
If you run into any issues or have suggestions on how to improve the WHTBoard experience, don't hesitate to reach out to me by replying to this email. I would LOVE to hear from you.
Thank you for being a WHTboard user!
CSM Name.
CTA button: Create a WHTboard
Email 2: Personalized Welcome from the CEO
Subject line: THANK YOU for joining the WHTboard family!
Hi {firstname},
John here, the CEO of WHTboard and I'd like to personally welcome you aboard!
If you have any questions as you're getting started, you can always reach out to me at john@whtboard.com or reply to this email. It's important to me to stay close to our users to ensure we create and maintain a world-class experience for you.
I'm glad you're here and would love to hear from you!
John
Co-founder & CEO
Email 3: High-five email on first product milestone
Subject line: Congratulations on creating your first whiteboard!
<High five image/gif>
Congratulations!
You just created your first whiteboard.
Whether it's a test whiteboard or an actual workspace for your team, you're getting the hang of WHTboard...and we're so proud of you.
<CTA button> Share the whiteboard with your team
You can use the above email copies for inspiration and create your onboarding emails in the HubSpot email editor and save them for building the campaign. Make sure you are saving all these emails as automated emails, then only you will be able to use them for automation workflow. Now, let’s jump into workflow setup.
Set up your onboarding workflow
Since you want to create the onboarding sequence as an automated campaign, you will have to set up an automation workflow in HubSpot. Automation workflows help you set up action workflows based on various triggers.
Step 1: Set up your workflow trigger
Just like most other marketing automation platforms, HubSpot also comes with workflow branching and trigger-based action flows. To set up a workflow, you need to follow these steps:
1. Go to Navigation -> Automation -> Workflows.
2. Then click on the ‘Create workflow’ button,
3. Choose a pre-built workflow templates or you can start from scratch.
4. Once you open the workflow builder, select ‘Contact-based’ enrollment on the left sidebar, and click ‘continue’ to go to the workflow builder.
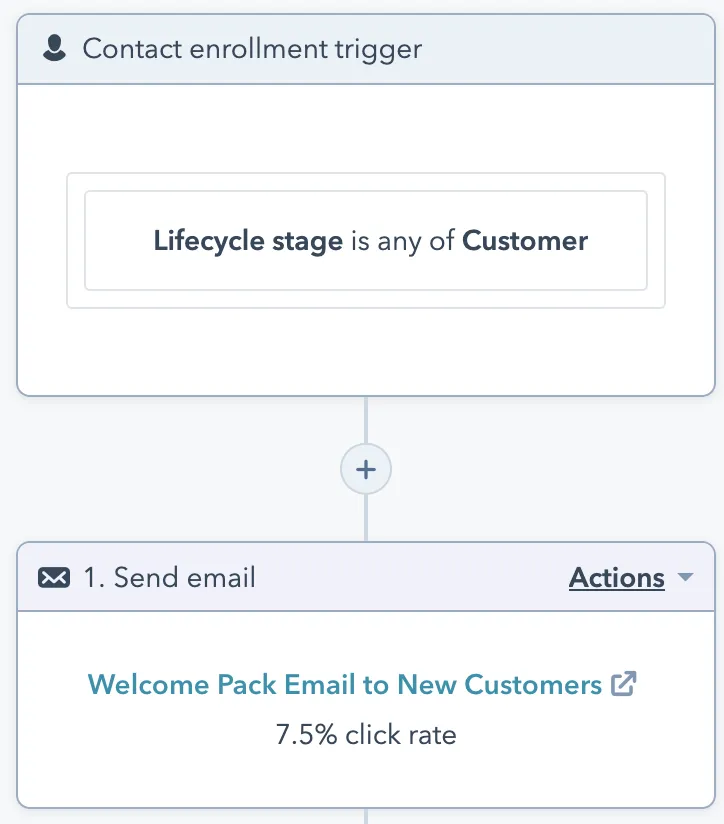
5. Then you can click on the ‘Set up triggers’ button and choose your trigger for the enrollment. For example, you can select customer properties -> lifecycle stage -> customer as the trigger.
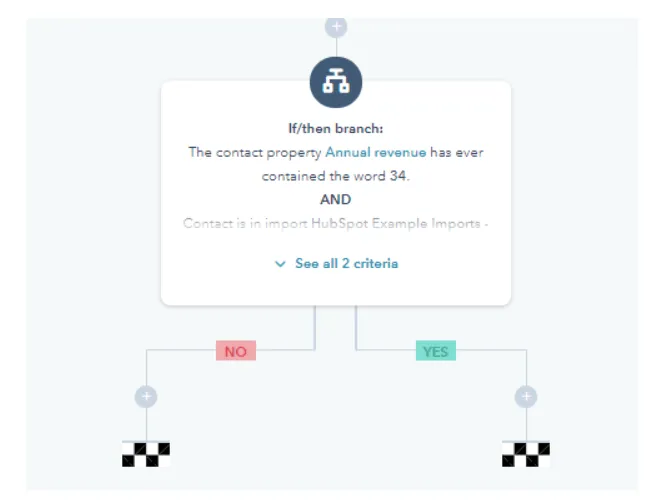
Step 2: Add branching and actions
After the trigger is set up, you can send the welcome email immediately or add a delay (for example, 30 mins after signup). Continue adding other emails in the onboarding series with delays in between.
Click on the + icon right below the trigger and you can select the action for your workflow.
Select ‘Send email’ from the list and choose the email you created as the first email.
Now click on + button below the action you just created and select your desired delay action from the list.
Here you can select the 2nd email and the following emails in that order.
Once done adding all emails and delays, click the ‘Review and publish’ button on the top right corner and make it live.
Now you have the onboarding campaign live and you are good to go. Similarly, you can set up the product milestone celebration email (high-five email for first product milestone or aha! moment) using the product data imported using Hightouch. However, because of the HubSpot limitation, you still can’t have all of the product activity data and use them as campaign triggers.
You can only set up basic welcome emails, product information, and educational emails through HubSpot marketing automation solution.
A Better way
No matter how elaborate or simple your product onboarding is designed to be, personalization is the (not so) secret sauce that enables you to talk directly to your users about their specific needs.
Personalized PLG onboarding emails that really speak to the customer or user and get them back on track to complete the onboarding process, initiate product engagement, and hit a home run with a conversion.
One sure way to pull off personalized product onboarding at scale in product-led growth companies is with Inflection.
Inflection combines product activity and CRM data to help PLG teams drive revenue, product engagement, and speed up onboarding. All this at scale for the exploding volume of users in a PLG company and without the dependency on data or engineering. Get started here to watch Inflection in action.